


ShotScribus is a software tool designed to help users manage screenshots, annotations, and digital documentation more efficiently. It can be necessary in professional endeavors, in school, or in personal use, but regardless, when properly installed on your computer, the software will provide a trouble-free experience. This tutorial will take you through the entire procedure of downloading and installing ShotScribus on your computer.
Why Use ShotScribus?
The ShotScribus has a number of features that can be of help to individuals and businesses, including:
- Screenshot capture and editing
- Annotation and markup tools
- Document organization
- Image sharing and collaboration
- User-friendly interface
These facilities are useful in enhancing productivity, particularly in developing tutorials, reports, or visual documentations.
System Requirements
One of the simplest requirements of using ShotScribus is to have a computer with the following basic requirements:
| Requirement | Minimum Specification |
| Operating System | Windows 10/11 or macOS |
| Processor | Dual-Core CPU |
| RAM | 4 GB |
| Storage Space | 500 MB Available |
| Internet Connection | Required for Download |
Step 1: Visit the Download Source
Open a web browser of your choice and open the site where the installer of ShotScribus is located.
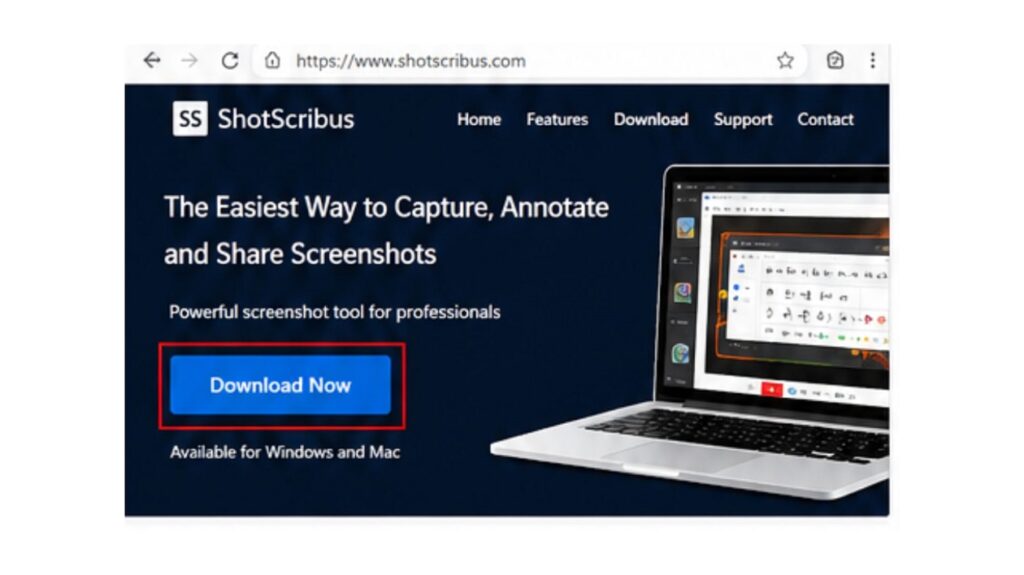
After loading the page, you should find the Download, Get Started, or Latest Version button.
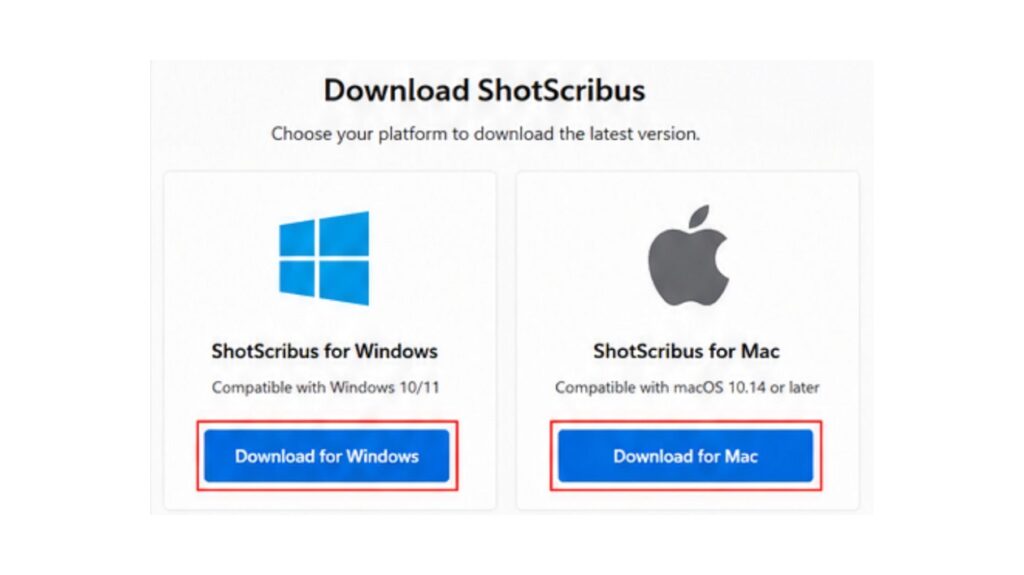
Step 2: Select Your Operating System
Most software providers offer separate versions for Windows and Mac users.
Choose the version that matches your operating system:
- Windows Installer (.exe)
- macOS Installer (.dmg)
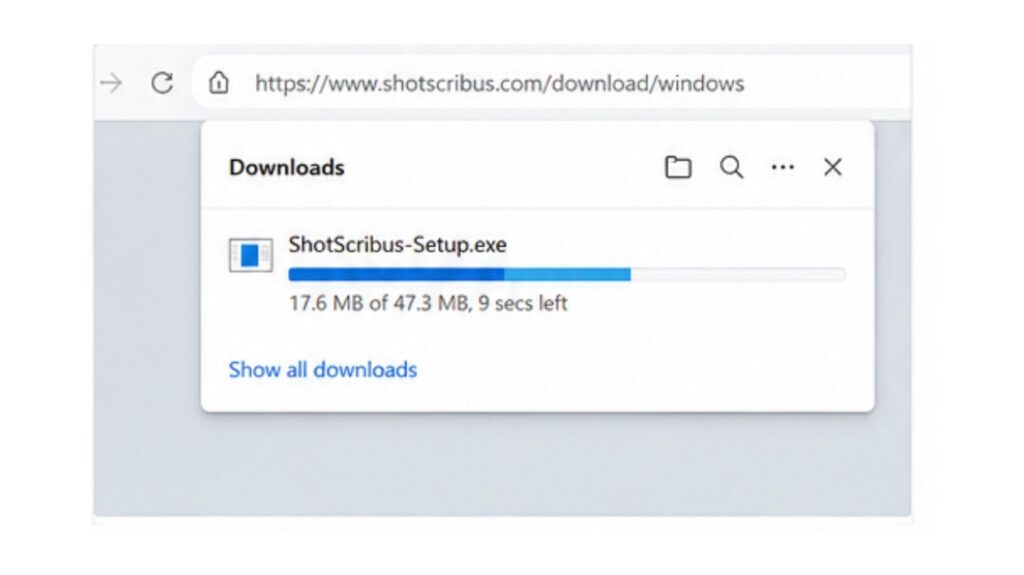
Step 3: Start the Download
Once you have picked the correct version, your browser must proceed to download the installation file.
This can take several minutes or a few seconds, depending on the speed of your internet.
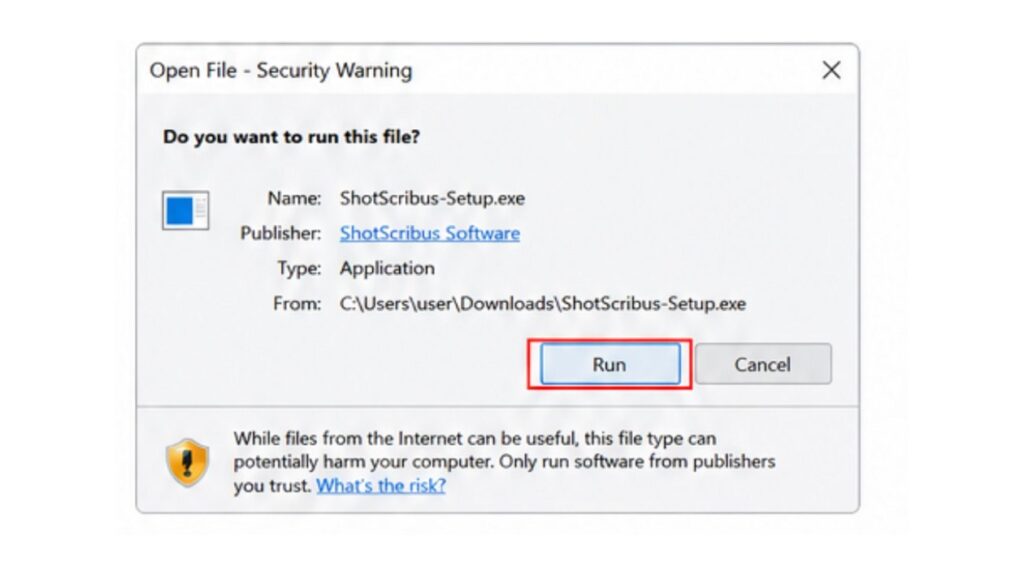
Step 4: Run the Installer
Navigate to the downloaded file and double-click it.
For Windows users:
- Open the downloaded .exe file.
- Click Yes if prompted by User Account Control.
For macOS users:
- Open the downloaded .dmg file.
- Drag the Scribus application to the Applications folder.
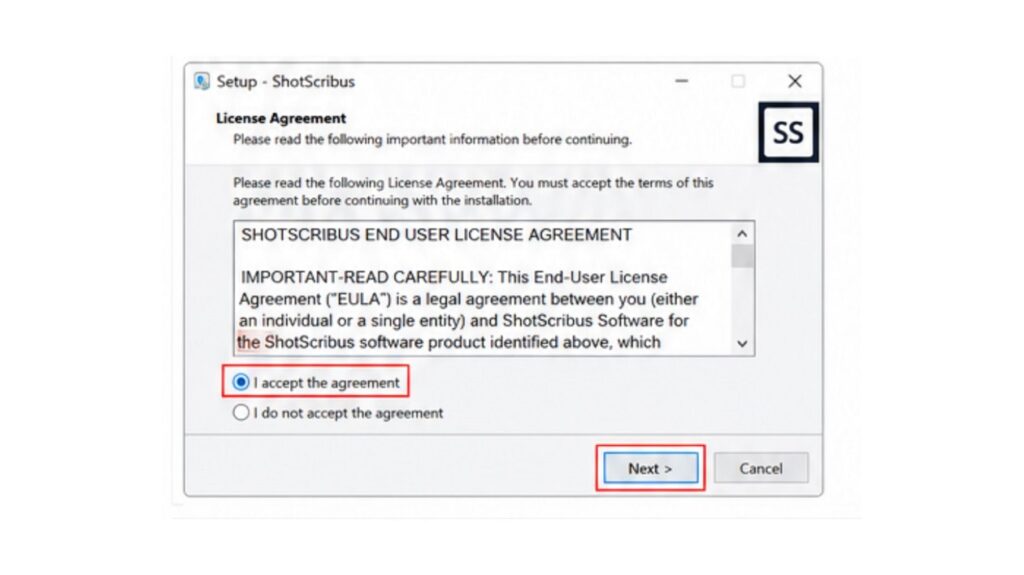
Step 5: Accept the License Agreement
The majority of software installations present users with licensing terms, which they need to accept.
Read and click through the agreement:
I Agree or Accept
to proceed.
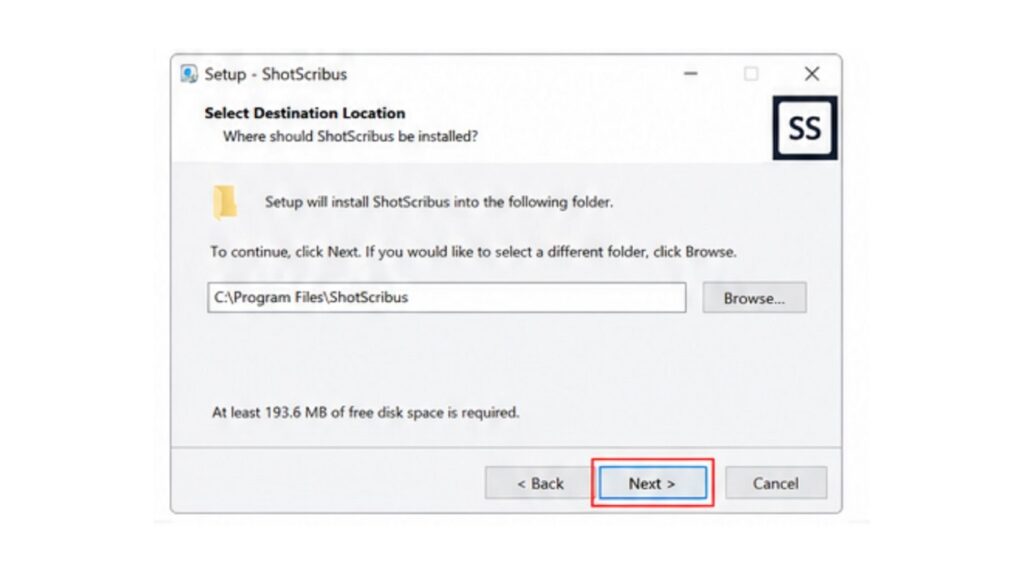
Step 6: Choose Installation Location
The installer will ask where you want to install the software.
You can:
- Use the default installation folder
- Select a custom directory
For most users, the default option is recommended.
Step 7: Complete the Installation
The installer will now transfer the required files to your computer.
The time spent is normally several minutes.
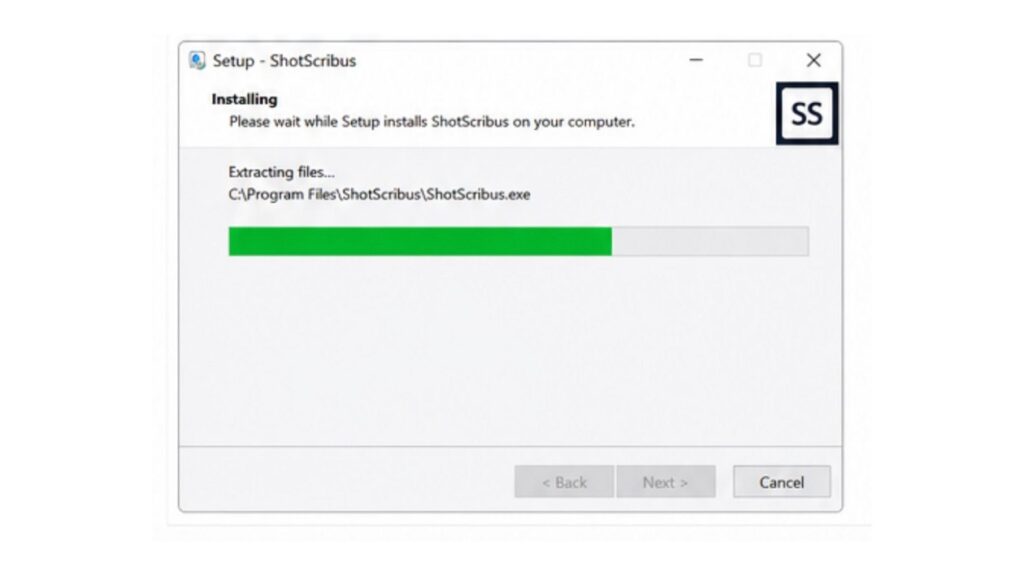
Once completed, click Finish.
Step 8: Launch ShotScribus
After installation:
- Open a Start Menu (Windows) or Applications Folder (Mac).
- Search for ShotScribus.
- To open the application, click its icon.
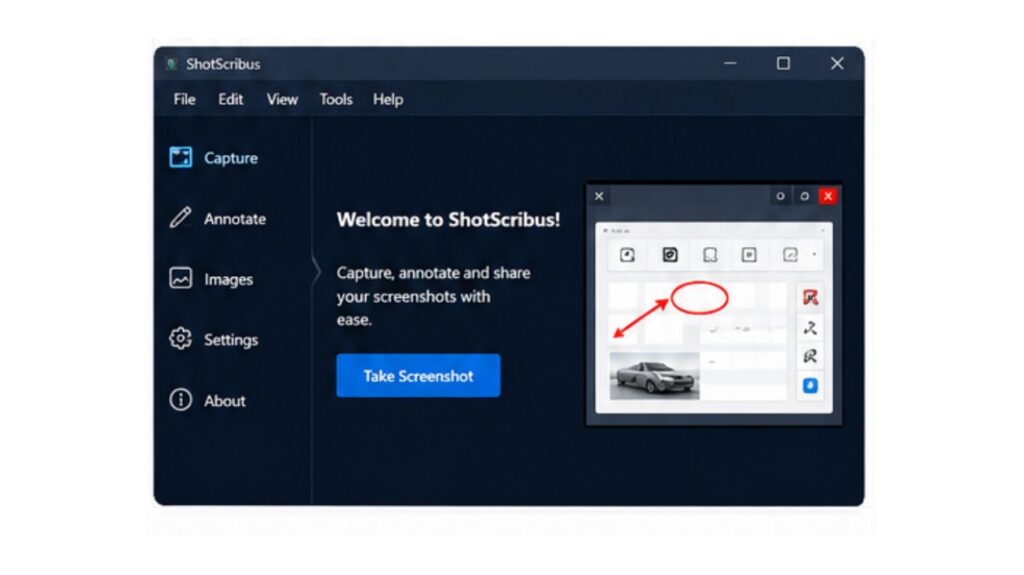
The software can provide a welcome screen or setup wizard on first run.
Initial Setup Tips
Having opened ShotScribus, take a look at the following configuration options:
Configure Save Location
Set a default folder for storing screenshots and projects.
Adjust Capture Settings
Customize:
- Image quality
- File format
- Keyboard shortcuts
- Annotation preferences
Enable Updates
Allow automatic updates to receive:
- Security improvements
- Bug fixes
- New features
Common Installation Issues and Fixes
Download Not Starting
Solution:
- Check your internet connection.
- Disable browser extensions temporarily.
- Try another browser.
Installation Blocked
Solution:
- Run the installer as Administrator.
- Temporarily disable antivirus software if it falsely flags the installer.
Software Won’t Open
Solution:
- Restart your computer.
- Reinstall the software.
- Ensure your operating system is updated.
Final Thoughts
There are easy ways of downloading and installing ShotScribus when you do it in the right order. To begin with, download the relevant installer, run the installer wizard, and configure upon launching the installer. After installation, you can start working with its screenshot capture, annotation features, and documentation capabilities to simplify your workflow.


